


Project: a bookend


 About this lesson
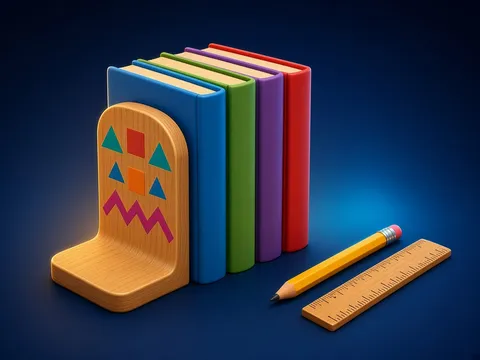
A project is planned work from an idea to a finished item. Stages: 1) Need and idea: books fall over on the shelf, so we need something to hold them. 2) Sketch: draw the bookend with measurements; the simplest shape is like a letter L, with the base slipping under the books and the upright holding them. 3) Materials: plywood, wood, thick card or thin metal; it must be strong. 4) Making: measure, mark out, cut, smooth the edges and join the parts with glue or nails. 5) Finishing: paint it, draw a pattern or stick on embossed foil. 6) Evaluation: does it hold the books, is it strong and neat, what could be better?
 What the book shows

In grade 5 technology pupils learn to work with wood and thin sheet metal, build a simple electric circuit and make a small project. Each lesson has safety rules, a sequence of steps and a practical task.
Textbook link:
This is not the textbook’s text but a short description of the topic. Check the exact page in your own textbook.
 The lesson step by step
- 1
Warm-up5 min
Books falling over on a shelf.
- 2
New topic10 min
Project stages.
- 3
Practice10 min
Sketch and measurements.
- 4
Game10 min
Making and finishing.
- 5
Wrap-up5 min
Exhibition and evaluation.
 Let’s understand
For the student Simple language
| Stage | Question |
|---|---|
| idea | What is needed? |
| sketch | What shape and size? |
| materials | What from? |
| making | In what order? |
| finishing | How to decorate it? |
| evaluation | Did it work? |
 For the parent
How to help
- Look at a shelf at home together: do books fall over, how tall should a bookend be? Help find scrap wood or thick card for the project.
 For the teacher
 Lesson goals
- Know the stages of a project (idea, sketch, choosing materials, making, finishing, evaluation), draw a sketch with measurements, make a bookend using the skills learned, and evaluate the work.
How to teach it
- Demonstration, working from an instruction card, practical pair work, a project
 Differentiation
- Weaker pupils work from a ready outline; stronger pupils make their own design
 Questions for the class
- How do we get from an idea to a finished item?
 How to check
The pupil follows the project stages, draws a measured sketch, makes the bookend and evaluates it against criteria.
 Scientific Scientific language
Why is the base important?
The weight of the books presses the base down and stops the bookend tipping over.
The angle
The upright and the base must meet at a right angle, or the books lean.
Self-study
Step by step
- I named the project stages.
- I drew a sketch with measurements.
- I made the bookend.
- I evaluated my work.
Going deeper
 Scientific language: for older students, parents and teachers.
Designers work the same way: they study the need, draw several sketches, make and test a prototype, and only then make the final version.
 Play and check
Which stage is this?
 How to write it down
- Draw a sketch of the bookend with measurements (for example 15 cm tall, 10 cm base).
- List the materials and tools.
How the classwork looks in the notebook
Sample: the date and heading follow this country’s notebook rules.
 Watch out: common mistakes
 Where it helps in life
- New materials and projects in grade 6
 At home
Core
- Decorate your bookend and test it on a shelf.
Extra ⭐
- Fill in an evaluation sheet: what worked, what would you change?
How to do it
- Work with a grown-up watching.
- Tidy up afterwards.
Answers for parents
Check: the bookend holds at least 5 books without falling, the angle is square, the edges are smooth and the decoration is neat.
Step-by-step homework solution — Show the solution (try it yourself first)
Work it out
- The bookend has two parts: a 15 cm × 10 cm upright and a 10 cm × 10 cm base. How much material is needed? 15 × 10 + 10 × 10 = 150 + 100 = 250 square centimetres.
How the homework looks in the notebook
Sample: the date and heading follow this country’s notebook rules.

 About cookies