


Drawing a plan


 About this lesson
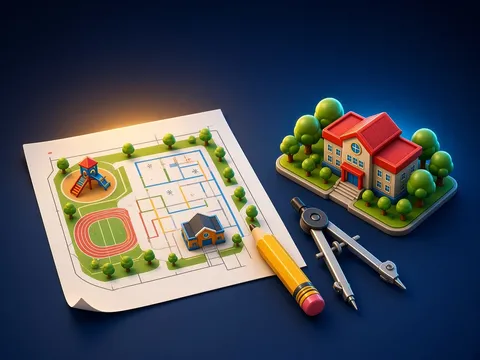
A plan of an area is a reduced drawing of a small piece of land seen from above. Features are shown with conventional signs: houses, roads, rivers, woods, orchards, bridges. A plan shows the land accurately, because over a small area the Earth’s curve can be ignored. Every plan has a scale. The scale tells how many times smaller a distance on the plan is than the real distance on the ground. A numerical scale is written like this: 1 : 1000, meaning 1 cm on the plan equals 1000 cm, or 10 m, on the ground. A verbal scale is written in words: “1 cm to 10 m”. A linear scale is a straight line divided into equal parts, which lets us measure distance without a ruler. To find a real distance, multiply the distance on the plan by the scale: at 1 cm to 10 m, 4.5 cm means 45 m. On a plan, north is usually at the top, south at the bottom, east on the right and west on the left. If not, an arrow pointing north is drawn on the plan. We find the directions with a compass: the blue (or red) end of the magnetic needle points north. At midday the Sun is in the south, and at night the Pole Star shows north. An azimuth is the angle between the direction of north and the direction to an object, measured clockwise from 0° to 360°: east is 90°, south 180°, west 270°. You can draw a plan of a small area by eye. To do this: 1) choose an observation point and find north with a compass; 2) measure distances in paces (first find the length of your own step, for example 60 cm); 3) choose a scale; 4) transfer the features onto paper by direction and distance and show them with conventional signs; 5) write the plan’s title and scale and draw the north arrow.
 What the book shows

In grade 6 the Geography course begins with geographic space: plans and maps, the latitude and longitude grid, fieldwork, the movements of the Earth and the parts of nature. Read the topic in the textbook, work with an atlas and a globe, and make observations around the school grounds.
Textbook link:
This is not the textbook’s text but a short description of the topic. Check the exact page in your own textbook.
 The lesson step by step
- 1
Warm-up5 min
The school yard from above.
- 2
New topic10 min
Plans and signs.
- 3
Practice10 min
Working with scale.
- 4
Game10 min
Compass and azimuth.
- 5
Wrap-up5 min
Drawing our own plan.
 Let’s understand
For the student Simple language
| Kind of scale | How it is written |
|---|---|
| numerical | 1 : 1000 |
| verbal | 1 cm to 10 m |
| linear | a line with divisions |
 For the parent
How to help
- Draw a plan of a room together: measure it in paces or with a tape, then draw it to a scale of 1 cm to 50 cm.
 For the teacher
 Lesson goals
- Know what a plan of an area is, use the kinds of scale, read conventional signs, find the compass directions and draw a simple plan of a small area.
How to teach it
- Working with maps and globes, observation, practical measuring, modelling, discussion
 Differentiation
- Weaker pupils work with pictures, models and ready-made diagrams; stronger pupils do map calculations and write their own conclusions
 Questions for the class
- Could you read a plan without conventional signs?
 How to check
The pupil explains what a plan is, tells the kinds of scale apart, calculates distance from scale, finds directions and azimuths with a compass and draws a simple plan.
 Scientific Scientific language
The magnetic needle
A compass needle is a small magnet; the Earth acts like a giant magnet, so the needle lines up north–south.
Measuring your step
Measure 10 paces and divide by 10 to find the average length of your step.
Self-study
Step by step
- I know what a plan is.
- I worked out a distance using scale.
- I found north with a compass.
- I drew a simple plan.
Going deeper
 Scientific language: for older students, parents and teachers.
The magnetic north a compass shows is not exactly the geographic North Pole; the magnetic pole slowly moves, so accurate maps note the difference.
 Play and check
Which kind of scale is it?
 How to write it down
- The scale is 1 : 2000. How many metres on the ground are 3 cm, 5.5 cm and 8 cm on the plan?
- What are the azimuths of north-east and south-west?
- Draw 6 conventional signs and name them.
How the classwork looks in the notebook
Sample: the date and heading follow this country’s notebook rules.
 Watch out: common mistakes
 Where it helps in life
- The parts of the grid
 At home
Core
- Draw a sketch plan of the school yard or the area around your home (with scale, north arrow and signs).
Extra ⭐
- Use your plan to work out the distance from home to school.
How to do it
- Find the matching map in your atlas.
- Explain what you learned to a grown-up.
Answers for parents
1 : 2000 means 1 cm = 20 m: 3 cm = 60 m, 5.5 cm = 110 m, 8 cm = 160 m. North-east is 45°, south-west 225°.
Step-by-step homework solution — Show the solution (try it yourself first)
Working it out
- On the plan it is 6 cm from the school to the park, at a scale of “1 cm to 25 m”. Real distance: 6 × 25 = 150 m. If your step is 50 cm, that is 150 ÷ 0.5 = 300 paces.
How the homework looks in the notebook
Sample: the date and heading follow this country’s notebook rules.

 About cookies